Quantcast
Channel: pocahontas' hair secrets
Viewing all 58 articles
Browse latest View live

luv natural leave-in

$
0
0
INGREDIENTS:
2 TBSP hairveda's whipped ends (or any conditioner)
2 TBSP trader joe's spa conditioner (or any conditioner)
4 TBSP aloe vera gel
2 TBSP shikakai cocasta oil
1-2 TBSP jojoba oil water until desired consistency.


REVIEW: deciding I wanted to stretch my products and use a more liquidy conditioner, I decided to try the kimmaytube homemade leave-in. it's usually used on naturals and used as a leave-in. I use it as a a leave-in and moisturizer. for relaxed heads, it's best to cut the recommended amount of oils in half, like I've done in my recipe above. due to the low ph of the aloe vera juice, or gel, it has good porosity correcting properties. I've been using this a couple months now, and it's been great! my hair feels softer and looks shinier. since it's liquidy, it also doesn't give my hair that greasy, laid down look at the end of the week due eo product builds up.

For those of you who don't know, Kim Love, the inventor of this recipe, is a very popular natural hair guru. Click here to go to her youtube channel called Kimmaytube.


hair porosity

$
0
0
I know this has been explained before, but I thought I'd explain it in detail since it seems some people are confused about it. first of all, I see some people saying their hair is unhealthy because it has low porosity. that is incorrect. hair that has low and normal porosity are healthy. hair that is high in porosity is unhealthy. another thing that I find girls teaching, which isn't exactly true, is that low porosity hair and protein overload go hand in hand. they are two different things because hair can have protein overload and a high porosity at the same time. just doing protein treatments can help smooth the cuticle, but it won't bring high porosity hair to low porosity hair by itself. so just remember: protein helps porosity, porosity doesn't help protein. also, not all proteins help porosity, you have to look for specific kinds of proteins. I was confused about this once, too.


low porosity - hair that isn't very porous has smooth cuticles that water doesn't enter in easily. but when moisture does gets into the cuticle, it will be shut in resulting in long lasting moisture. this kind of hair is usually shiny, but it is resistant to chemical treatments like dye and relaxers. low porosity hair does not need cones or much protein either, you can get protein overload easily. low porosity hair will benefit from natural high ph products, like Castile Soap, Baking Soda, and Bentonite Clay. many low porosity haired girls have also have had success with Giovanni 50/50 Balanced Moisturizer.

normal porosity - this kind of hair can be thought of as being balanced. it can absorb a fraction of water, but is not overly porous. moisture can get in the hair strands and last. unlike low porosity hair, it can take chemical treatments okay, but you should keep it mind that over time the hair will become more porous by doing so.

high porosity - think of chemically processed hair that isn't being properly taken care of. this hair is damaged and has lots of holes in the hair shaft. these holes are like a sponge and absorb water easily, but this does NOT mean it's better for moisturizing. just as quick as the moisture comes the moisture goes. think of the hair strand as a house made of doors. with high porosity hair all the doors are open, making it unsafe for the cortex and insides of the cuticle. this type of hair does take in chemicals better, but it's not suggested because you'll just end up with even more damaged hair.


relaxed and chemically treated hair has a natural high porosity, but regular use of products such as Roux Ph Control, Aloe Vera Juice, and Apple Cider Vinegar will combat this and restore hair to normal porosity. proteins that coat the cuticle and oils will also help. note that oils help smooth the cuticle, but this is not due to ph. oils are not water soluble so they do not have a ph.

now that we understand the levels of porosity lets talk about the test. many of us hair fanatics know about this test. you divide your hair in four sections and take a shed strand of hair from each. this is because one section of hair might be healthier then another section. then you put the strands of hair in a tall cup or bowl and see if it floats. if it floats for a while it's healthy. here's what you should do for more clear results. see if your hair floats for at least 15 minutes. if it does then your hair is alright. if it doesn't it has high porosity and you have to up on your ph correctors. if you come back in an hour (with occasional checks in between the hour) and it's still floating, congratulations! your hair is in very good condition. now push down the strands and if they float back up (be patient!) your hair has low porosity.
______________________________________________________
here is an article that further discusses the science of hair porosity:
The "Other Path" to Moisture, by Joe Parker
______________________________________________________

here are some of the tips for low porosity hair that's explained in the article:
  • If a product will hydrate your fingers then it will moisturize low porosity hair. 
  • Adding a tiny amount of castile soap to your deep conditioner will boost it because it will lower the overall surface energy of the water system. 
  • To boost your leave-in or rinsable conditioner, heat it up and apply it to your hair at an elevated temperature: 30 to 40 C. 
  • Hydrolyzed rice, silk and wheat proteins have a molecular weight, making them better for low porosity hair.

ph higher than water equals higher porosity, and ph lower than hair equals low porosity. so to finish it all off, here are some recorded ph levels of hair related things:
  • 14 sodium hydroxide (lye) 
  • 13 bleach
  • 9-11 calcium hydroxide & guanidine hydroxide (no lye)  
  • 9-11 permanent dye 
  • 8.9 castile soap
  • 8-9 bentonite clay
  • 8-9 ammonium thioglycolate (chemical used in perms)
  • 8-9 semi permanent dye                       
  • 8-9 baking soda 
  • 8 sea water
  • 7 pure tap water
  • 6 milk
  • 5-6 tea
  • 5 soft drinking water
  • 5 hair 
  • 4-5 coffee
  • 4.25-5 apple cider vinegar 
  • 4.5 roux porosity control
  • 3-5 aloe vera juice 
  • 2 lemon juice

black henna gloss ( without indigo )

$
0
0
INGREDIENTS:
  • 2-4 TBSP henna 
  • 4 TBSP cheapie conditioner 
  • 1-2 TBSP aveda black malva 
  • 2 TBSP vatika coconut oil 
  • 3 TBSP honey or molasses 
  • rose water (optional) 
DIRECTIONS:
  • Detangle, dampen, then oil hair. 
  • Mix 2 tbsp of henna with cold (rose) water in plastic container until the consistency turns pudding like. ( Do not use metal utensils ) 
  • Add conditioners, oils, molasses and honey. 
  • Put on old t-shirt and gloves; and apply to hair immediately. 
  • Pile hair on head and put on plastic cap. 
  • Sit under dryer for 30 minutes on moderate setting, or let it sit on hair for 1-2 hours. 
  • Rinse out and condition, rinse out and condition. Gloves still on. 
  • Follow with deep conditioning. 
  • Clarify hair following week or wash. 
STORAGE:
henna paste: can freeze, but for better color deposit


PRE-REVIEW:
after doing ALOT of research I finally found a way to darken my hair with a gloss and without having to do a two step with indigo. thanks LadyChe from lhcf! aveda black malva is a natural conditioner that darkens hair. it's on the expensive side if used alone, but it's life gets extended when using as an ingredient  I can finally stop looking for hendigo glosses that go darker than dark brown, which doesn't seem to exist. Plus the conditioner diminishes red tones, making it a good match with henna. ... 

I have yet to try this, but I will soon.


homemade castile shampoo

$
0
0
RECIPE:
2 TBSP dr. bronner's castile soap
1 TBSP jojoba oil ( or olive oil )
3/4 CUP water
4 TBSP rose water

 DIRECTIONS: pour over hair like a rinse, letting it soak down and throughout the hair. follow up with a conditioner. castile opens the hair's pores for better deep conditioning, so it's best to finish off with an apple cider rinse, which also has slight clarifying properties, or roux ph corrector so that the pores close back.


REVIEW: the kind that I've used is the liquid peppermint one. they also have one already mixed with rose water, which I might try in the future. I add rose water to my mix as a light moisturizing ingredient. but the peppermint one is nice with a tingling feeling. castile soap is the only natural and sulfate-free shampoo that deeply clarifies hair. usually to really clarify hair sulfate ingredients are needed. even with the peppermint, high ph, and clarifying properties, when mixed properly castile soap isn't drying at all. my hair would feel very good after shampooing with this.

according to the label, the Dr. Bronner's Castile Soap is made of... water, coconut oil, potassium hydroxide ( none remains after saponifying oils into soap and glycerin ), olive oil, hemp oil, jojoba oil , peppermint oil , mentha arvensis extract, citric acid, tocopherol

even if it makes your hair feel nice, castile shampoo should not be used too frequently, at least a month gap. this is not only because castile shampoo is a clarifier, which can dry hair, but because it has a very high ph of 9. this is the reason people with natural curly textures notice their curls lay down more. when using castile shampoo, it's best to take advantage of the open cuticles with a great protein deep conditioning before using a ph corrector, like Roux Porosity Control. if your hair is normal or high porosity, it would help for you to know that protein treatments are more effective when the cuticles are lifted because the molecular protein can enter the hair strand easier. castile shampoo is even better for hair that naturally has a low porosity since it opens the cuticles so moisture can enter easier, and does not sit on top of the hair strands.


apple cider rinse

$
0
0
MY RECIPE:
2 CUPS water
1 CUPS rose water
4 TBSP apple cider vinegar
1 TBSP any oil
1 TBSP honey

DIRECTIONS: rinse out regular or deep conditioner 50-70% out. pour apple cider rinse throughout hair, making sure all of it gets saturated. also be sure to get the scalp as it gently cleanses and restores the ph of the scalp. leave in for a couple minutes, then half rinse out. dry hair as usual.


REVIEW: this has had great results on my hair, the main benefit has been shine. apple cider has a low ph, so it seals the cuticle and traps moisture in the hair strands. but remember it's not good to do it too often. apple cider has clarifying-like affects, so it can cause dryness when used too frequently. I started experiencing this when I was doing this every time I washed. my hair was not necessarily becoming dry, but I was no longer getting the same effects I once was. I've also read that using a acv rinse as a final rinse leave-in will have a better effect on your hair. I've yet to really try that, the most I have done is rinse it out un-thoroughly so that some of it remains in my hair. I would think that using an apple cider rinse as a leave-in would also lead to dryness, and that an aloe vera juice leave-in would be a better substitute since it also has a low ph of 4 and with moisturizing properties. but I can't say because I have not tried it yet.


conquering protein overload

$
0
0
when trying to conquer protein overload the best battle strategy is to only use moisturizing products with no trace of protein. It took me a while to realize many of my moisturizing products, and even shampoos, had traces of protein. I also didn't want to spend a lot of money, so I tried getting the most effective and cheapest products I could. below I've listed how I changed my regimen to combat protein overload, listed from the most helpful.


PRODUCTS
  • Hairveda Whipped Ends 
    • very good leave-in, a little expensive with shipping, especially if you're buying it alone. the shipping for american residents is about 7 dollars.
  • Hairveda Sitrinillah
    • also very good, but can be expensive with shipping like the whipped ends.
  • Aubrey Organics Honeysuckle Rose 
    • also kinda expensive, but it was the most effective in reversing my protein overload. I used it as a deep conditioner and diluted it to use as a leave-in to stretch the dollar. this is also easier to get, usually found at your local vitamin shoppe. 
  • Queen Helene Cholesterol 
    • has mineral oil, but was very helpful. breakage is associated with protein overload because the hair is stiff and has little elasticity, but cholesterol helps restore elasticity. one thing that people may not like though, is that it has a distinct smell. to me, it smelled like the ferret shampoo I use to bath my ferret with. so I actually liked it because it brought back memories! 
  • Honey & Molasses 
    • cheap ingredients to add to conditioners to give them a moisture boost.
  • Mane n Tail Detangler 
    • helped detangling, because protein overloaded hair tends to stick together, making it knot easily. I only used it a couple days before washing because it has cones, which will not mix good with protein overload if there is a build up. 
  • Suave Almond & Shea Butter 
    • simple cheapie conditioner with no protein
REGIMEN
  • deep condition or co-wash once a week with steam 
    • helps the conditioner to penetrate the barriers of protein. I used the steam from my college's steam room and sauna.
  • clarify (with castile soap and jojoba oil) every two weeks 
    • clarifying dries the hair, but it also gets rid of the traces of protein product coating your hair. product build up is also not a good combination with protein overload. the castile soap also opens your hair's cuticles to take in moisture better. just make sure to close them back afterwards. 
  • final apple cider vinegar rinse 
    • to keep the hair's ph balance stable since I could no longer us roux ph corrector, which has protein in it. this also helps to keep the scalp clean when co washing and seals in the moisture after deep conditioning and using castile soap.
  • baggying & wet bunning
    • baggying excessively is one of the top things that really helped me. if I didn't do excessive baggying and wet bunning I'd still have protein overload ( wet bunning is when you bun your hair after washing and conditioning it, so that the hair stays wet and moist longer ). what finally got rid of my last traces of protein overload was when I left a bag on for 3 days in a row! with a good leave-in 
  • protective styling 
    • I kept my hair in braids (at least 8 total), and later twists. I found the twists worked better from keeping my hair from tangling. I also kept them in the shower because that's when my hair would really tangle. the only times I took them out was to detangle and moisturize my hair. 
THINGS I LEARNED
  • not to pile your hair with moisturizer or conditioner, because that just creates build up. being light handed and not heavy handed is more effective. 
  • stay far away from all protein ingredients, even if it's a little bit. especially from any hydrolyzed protein, which means the protein is small and molecular so it can penetrate the hair better. 
  • stay away from coconut, avocado, and banana ingredients, especially as a leave-in. coconut helps keep the protein in you hair, and all of them have little traces of protein. 
  • don't use any ayurvedic powders like amla, shikakai, and henna, because they all have strengthening properties like protein. 
  • extra virgin olive oil and grapeseed oil are the best oils to seal with. especially with relaxed hair because they're light, but penetrating.

inspirational hair videos

$
0
0
here are several youtube videos I admire and watch when I need some hair motivation, enjoy!

Patience Hair Commercial

You Can Shine

Whip My Hair ( acoustic version )

I Love My Hair

Hairy Tale

my coconut oils

$
0
0
coconut oil is one of the most popular, if not the most popular, hair oil used by healthy hair journey girls. why? coconut oil is commonly mistaken as a moisturizer. in reality, and science, oils can not moisturize the hair because oil is not water soluble. how can something that doesn't contain water moisturize the hair? moisturize means adding moisture, the presence of water. the reason coconut oil is commonly confused as a moisturizer is because of it's unique properties. out of all the oils, coconut is the most penetrating and nourishing, the closest thing to an oil being moisturizing. while fine haired girls might want to try something lighter, this is good for girls with big cuticles like me.

another unique benefit of coconut oil is its ability to retain the protein in hair. this is great for relaxed heads or anyone with chemically treated hair. this is because protein is lost during the relaxing process, which is why regular protein treatments must be done in order to fill in the gaps in our hair. so using coconut oil helps make the protein fillers last longer. if your relaxed, but have fine hair, you can always use coconut oil as a hot oil treatment!

there are two brands of coconut oil I use: Dabur Vatika Coconut Oil and Hairveda Vatika Frosting.

vs. 

DABUR VATIKA REVIEW: you can say that Dabur Vatika is the original, because Hairveda's was created as an alternate and improved version made for afro textured girls. Dabur Vatika is a purely indian hair oil, which can be found at almost any indian market. it's made with a ton of ayurvedic goodness, like neem, brahmi, amla, henna, milk, rosemary oil, and lemon oil. this coconut oil is also known for it's distinct smell. to me, it smells like a coconut soap, which doesn't bother me at all. I like it! it smells very natural. not like a coconut fragrance, but actual coconut. Dabur comes in different sizes, but I usually get the one like in the picture above.

in room temperature coconut oil is solid. how do they expect you to get a solid out of a bottle? the Dabur bottle is microwave safe so that the oil can easily be heated and turned to liquid. I usually heat mine for 15-20 seconds, more if I'm doing a hot oil treatment. the Dabur Coconut Oil I mainly use as a hot oil treatment and prepoo ( before shampooing treatment ). everyone's hair responds to products differently, and my hair likes it better as a hair treatment and with heat rather than as a sealant. I also like the application of the bottle. it's made so that the oil can only come through a tiny punctured hole. this is good because a little oil goes a long way. I only need a drop or two of oil to lightly coat my strands, and that's coming from someone with a lot of hair. the other, more important reason I like the bottle is because it works as a dropper so I can pour it directly on my hair without it getting messy. putting product directly on your hair, rather than from your hands, has a better effect. I can always feel the difference. this is how most girls of east indian heritage oil their hair, directly rather than from their hands.


VATIKA FROSTING REVIEW: Hairveda's indian inspired products are more suitable for dryer and curler hair types. like Dabur it's completely natural and made of ayurvedic goodies, like amla, henna, and lemon. unlike Dabur Vatika their container is in a jar and not microwavable safe. but there is no need to heat it, just take a scoop of the solidified oil with your finger and lightly spread it in your hand before your hair. it will melt instantly due to your body temperature. also the smell is greeeeat! it smell's like natural cake frosting! one of my best smelling hair products. all of Hairveda's products have great smells. and also like Dabur Vatika, a little goes a long way. I've been using the first jar I bought for more than a year now, maybe even two? it also lasts longer than my Dabur Vatika. but that might be because I use it as a sealant rather than for oil treatments, and treatments take more product. though I might use Dabur as a sealent when I need something lighter or when my hair is  getting too shiny, I prefer Vatika Frosting as a daily sealant because it gives my hair more shine and moisture retention.


healthy vs. damaged hair

$
0
0
"relaxed hair is just damaged hair."

this is the message the media has been sending nowadays, so having healthy relaxed hair might seem like an oxymoron. in reality, all hair is damaged to a certain degree, so just saying "healthy hair" is an oxymoron. damaged literally means 'harmed and/or impaired value or normal function'.  hair products work by fixing the damages in our hair. if our hair was in perfect condition, hair products would not work on it. ever notice how soft and nice a new born baby's hair is? they're the only ones how can really claim to have healthy hair, as their hair has not been exposed to the damaging conditions of the sun, wind, clothing, etc. so truthfully everyone has damaged hair, and everyone can fix their damaged by treating it with products (not to perfect condition though.)

what healthy and damaged really means in hair language is how it looks cosmetically. healthy hair is hair that does not break easily, has a good amount of elasticity, has a proper balance of moisture and protein, and has a low or medium porosity. the more things you do not have from this list, the more damaged your hair is. processes like perm, dye, relaxer, and bleach damage the hair to a bigger degree than damage from outside elements (sun, wind...), but that does not mean the hair will forever be damaged. that's like saying dry natural hair can never by soft and moisturized.

understanding this, you will understand why saying, "I don't care how healthy your hair looks, it's unhealthy," doesn't make sense. because for hair to look and feel healthy means it is healthy.


how do relaxers work?

$
0
0
HISTORY
relaxers were invented by Garrett Morgan in 1910. you might now Mr. Morgan better as the inventer of traffic lights. and like many inventions of the time, relaxers were created by accident. Mr. Morgan was trying to create a new lubricating liquid. taking a break from his hard work, he wiped the liqiud off his hand using a wool rag, but came back to see that the rag's texture turned smooth. the first chemical straightener, "G.A. Morgan's Hair Refining Cream," was created!

SOME SCIENCE

there are two types of relaxers: lye and no-lye. lye relaxers are made up of the chemical sodium hydroxide, which has a high ph ranging from 10-14, usually 14. no-lye relaxers use calcium hydroxide instead of sodium. this chemical has a slightly lower, but still high ph of 9-11. so which one is better? that depends on you. even though lye is higher it makes the hair straighter, if that's the style your looking for. and it doesn't strip the protein and moisture balance in your hair as much as no-lye. but it's unhealthy for the scalp and again has a very high ph. no lye is milder on the scalp and has a lower ph. but it doesn't straighten the hair as well and leaves mineral deposits in your hair. it's wise to follow up with a clarifying shampoo after neutralizing out a no-lye relaxer.

MORE SCIENCE

relaxers work by penetrating the cortex of the hair and breaking the disulfide bonds. this relaxes the curl, resulting in straighter textures. disulfide bonds are two sulfur atoms that are connected to each other. straight hair, which has a rounded cuticle, has disulfide bonds that are aligned and scarce throughout the cuticle. curlier hair has more oval, half moon shaped cuticles and more dissulfide bonds that are arranged in a more slanting pattern. so relaxers work by reducing the amount of disulfide bonds in the hair. likewise, curly perms work by adding more dissulfide bonds into the stand.

crazy growth overload!

$
0
0
this is a recording of my hair growth for the past several months. recently I was participating in a hair growth challenge, well actually, I started it rather then being just a participant! it started the first of january and ended the last day of march, lasting 3 months. it was called 'The Super Ultra Crazy Growth Overload Challenge,' awesome name right? each participant had to do a certain number of hair growth practices, as the goal was to reach 3 inches in 3 months. for those of you who don't know, the average growth rate is 1/2 an inch per month.

when I started my hair length was 25 inches, reaching waist length. and my usual growth rate is 1/2 an inch every 5 weeks. on february 10, however, I measured my hair and it had reached to 26 inches. in 5 weeks! and double my normal growth! my hair didn't grow evenly though, but it still looked acceptable.

usually my hair grows pretty evenly, but it's been handicapped due to the protein overload I went through about half a year ago. usually girls that go through this lose a lot of inches, I'm just grateful I only lost one inch of predicted growth.  I didn't lose any inches I already had, my hair still grew!

although my end were evened out after a little trim, the thickness in my ends were gone. you can see how my hair looked below...


and the regimen I followed that lead me to gaining an inch was...
  • use sulfur/jbco (jamacian black castor oil) mix twice a week
  • mini scalp massage after applying growth aids
  • use cayenne pepper oil 30 minutes before washing
  • wash/co-wash every once a week
  • bun whenever at home and baggy for at least an hour
  • ghe method (green house effect) two times overnight
  • dust hair once a month 
  • daily multivitamin, garlic, fish oil, and zinc supplements

as it became the middle of my semester, however, I started slacking on this schedule. the only things I continued doing was dusting, taking my supplements, bunning, and sometimes using cayenne pepper (I would forget x p). but somehow, when I measured my hair on the last week of the challenge, my longest hairs reached to 28 inches. that was a big surprise as I wasn't even following my regimen anymore. I had gained an inch and a half in 7 weeks! my hypothesis is that it was the zinc. looking it up, zinc is suppose to benefit hair growth, but I never see many health hair journey girls talk about it. I'll be testing this soon though, by using just zinc and seeing if I see a difference.

by the end of the challenge, my ends were so stringy I trimmed an inch, but accidently trimmed two off. oops, oh well. my hair needed it though. so currently I'm back to 26 inches, with 3 inches of new growth. the picture right above is the same as the one with the purple shirt below, but I stretch my hair out so you can see the length better as my hair wasn't perfectly straight. because my hair isn't flat ironed like in the first collage, you can notice my thin ends better.
 

hair patterns ( the difference between textures )

$
0
0
 

what determines hair texture? what's the structural differences between straight hair and curly hair? truthfully science doesn't have all the answers to this subject yet. for example, why does hair texture change in some individuals as they get older? when I was younger, I think I had a looser curl pattern than what I have now. a common guess to why hair texture changes is the changes in our hormones, but it's just an educated guess.

there are several known factors that contribute to different hair textures: follicle shape, disulfide bonds, and sebum flow.
 
SHAPES
the shape of our hair cuticles are a result of the shape of our scalp's follicles. hair that grows out of round follicles will have a rounded cuticle, thus straighter hair. hair the grows out of crescent moon shaped follicles will take on a more oval shape, thus curlier hair. a good metaphor I read that paints a good picture is to think of it like the type of ribbon you use as a balloon tail. when you pass a scissor blade pass one side of the ribbon it curls up. it's the same concept as a hair strand passes through the half moon shaped follicle.


BONDS
as stated before in how do relaxers work, "disulfide bonds are two sulfur atoms that are connected to each other. straight hair, which has a rounded cuticle, has disulfide bonds that are aligned and scarce throughout the cuticle. curlier hair has more oval, half moon shaped cuticles and more disulfide bonds that are arranged in a more slanting, zigzag pattern."
 
hair is comprised of almost 90 percent keratin protein and 3 percent moisture. hair is also made up of 4 different chemical bonds: peptide, disulfide, salt, and hydrogen. getting into some chemistry, disulfide bonds are the second strongest chemical bonds in the hair, and are also called sulfur bonds. polypeptide bonds form the keratin proteins found in hair, are the strongest bonds, and are also called keratin bonds. a disulfide bond is created when two sulfur atoms from two neighboring polypeptide bonds connect.  flatter, oval shaped cuticles are able to hold more cysteines, which is an amino acid containing sulfur, and allow them to come in contact with one another. and so with more sulfur atoms coming into contact, more disulfide bonds are able to be created, stabilizing the curly hair structure. a hair cuticle with a rounded structure, on the other hand, has less sulfur atoms and so allows less disulfide bonds.

unlike two of the other mentioned hair bonds mentioned, disulfides bonds are not broken by heat or water. disulfide bonds, being one of the strongest bonds, is one of the reasons why our hair reverts back to out normal texture after heat straightening or after getting wet. it's what stabilizes our hair structure. disulfide bonds can only be altered by chemical processes. and, it is why once we chemically treat our hair with relaxers and perms the change in texture is permanent.

sodium hydroxide relaxers work by replacing the original disulfide bonds with a bond called a lanthionine bond, which only has one sulfur bond. curly perms, on the other hand, work on the hair by forming new disulfide bonds with two sulfur atoms.  Japanese straighteners (aka thio relaxers) use the same chemical as curly perms, but is able to straighten the hair. this is something I have to do more research on.
 
 
AND FLOW
this is a topic where more research still needs to be done. our hair follicles contain sebaceous glands, which are glands that produce sebum (our natural oil) to lubricate our skin and hair and keep it supple. our body's natural oil traveling from our scalp to the ends of our hair is commonly known as sebum flow. it's harder for sebum to flow through curlier hair, however, which makes since because the oil has to slide around a spiral rather than a straight line. this is why curlier hair tends to be less oily than straighter hair. this is why curly hair tends to have a higher porosity than straight hair, because there is not as much oil to slick down the cuticle. this and because sebum lays down hair is why curly hair has more volume and frizz. the laying down of the hair strands also adds weight to the hair, which can result in a looser hair texture.

many healthy hair journey girls that take silica supplements for hair better growth and health notice that their hair texture becomes looser. there hasn't been much research for why, but an educated guess is the increase in sebum. many of these girls that report a different hair texture also report that their hair feelings more nourished, which would be a result of sebum. I will also be trying out silica in the near future. probably within a month.


japanese straightening (real alternative to relaxers)

$
0
0
DIFFERENCE BETWEEN RELAXING & JAPANESE STRAIGHTENING
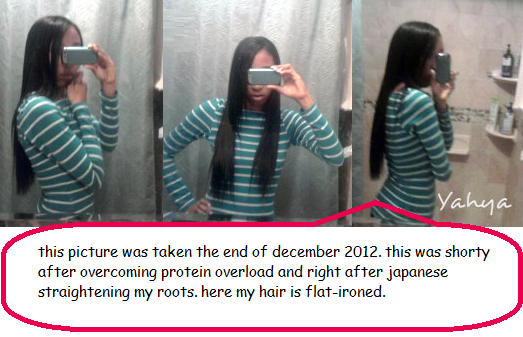
so about half a year ago, November-December, I Japanese straightened for the first time at a salon called Hairs Talent in Connecticut. I choose to Japanese straighten because...

1.  it's a much less harmful chemical than relaxing. while relaxers uses sodium hydroxide (ph of 14) or calcium hydroxide or guanidine hydroxide (ph of 9-11). Japanese straightening, on the other hand, uses ammonium thioglycolate, the same chemical used in curly perms. and has a ph of 8-9.

2. the disulfide bonds in the hair are replaced rather than permanently broken. as stated before in 
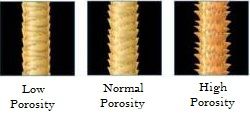
hair patterns, "disulfide bonds are two sulfur atoms that are connected to each other. straight hair, which has a rounded cuticle, has disulfide bonds that are aligned and scarce throughout the cuticle. curlier hair has more oval, half moon shaped cuticles and more disulfide bonds that are arranged in a more slanting pattern... sodium hydroxide relaxers work by replacing the original disulfide bonds with a bond called a lanthionine bond, which only has one sulfur bond (this decrease in sulfur bonds gives it a structure more similar to straight hair). curly perms, on the other hand, work on the hair by forming new disulfide bonds with two sulfur atoms".

when using ammonium thioglycolate, whether in a curly perm or Japanese straightening, the sulfur bonds are temporarily broken and than reattached back, while in a sodium hydroxide relaxer the sulfur bonds are permanently broken because they're turned into lanthionine bonds where there is no longer two sulfur atoms, but one.

3. less product usage. because there isn't as much protein and moisture lost, and the hair porosity isn't raised as much, less deep conditioning, leave-in, and "fixing" is needed. the health of the hair is more stable compared to relaxed hair. think of the extent of damage like dyed natural hair that looks flat ironed, this is the amount of care it'll need.

4. straighten curl rather than relaxed curl. rather than a relaxed curl, Japanese straightening literally straightens your hair. your hair does not have the personality of curly hair, no frizz. you can air dry your hair and no frizz. as my hair has been getting longer I wanted a little less volume and less detangling.
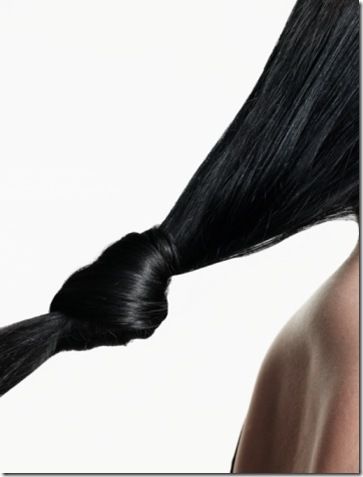
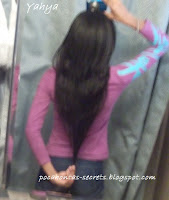
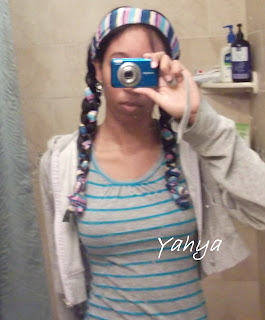
after blow drying at Hair Talents
Japanese straightened roots--Relaxed length        


 5. stronger line of demarcation. even though the texture difference is increased there is less breakage when stretching compared to relaxers, making transitioning easier. also, you can put a curly perm over your straightened hair is you ever want to go curly, because the two processes use the same chemical.

NOW THE BAD
you have to have at least 3 inches of growth to do it, if your Japanese straightening your whole head and have split ends it can make your ends look fried (usually people cut an inch off after the process, but this doesn't happen with touch ups); the process is lengthy and can take from 3-6 hours depending of your hair; it's hard to do it yourself, especially if you're not use to applying stuff on yourself, it's better to have 4 hands when applying this; it's a new thing so there isn't that much information about it in the hare care journey community, especially because of the myth that it can't be done on afro hair; and at salons it's expensive. veeeery expensive.

WHY JAPANESE STRAIGHTENING ISN'T "SUITABLE" FOR AFRO HAIR
the reason it's said that it's not suitable for afro hair is because you most likely, especially is your doing it yourself and isn't being done by a hair style expert, won't get the dead straight results Japanese straightening promises. it's suppose to give you shiny straight hair like the typical Asian hair. kinky hair will have a more subtle shine and not be poker straight and the kinkier your hair, the more likely you'll get a little wave. but to me, that's ridiculous! the results are still better than relaxed hair, and you can always lightly flat-iron if you want that pin straight look! and I'm sure most girls here don't even want that pin straight look! if you Japanese straighten to get pin straight hair, know that it will be harder to hold a curl. to get the texture you want, you can judge your curl type and get a resistant, normal, or mild formula.

WANT INFORMATION FROM AN EXPERT?
Japanese straightening goes by many other names: thio relaxer, thermal reconditioning, thermal relaxer, etc. as stated before, there is not much information about Japanese straightening in our community. I myself have now only straightened my hair using this solution twice. once at the salon and once at home. I know a lot on the subject, but I am not an expert. still learning. so I might not now all answers if asked for advise. (sorry!) here is a site I found of a stylist who is very educated on the subject and has a forum where he gives very educated answers to thio relaxed heads. the website is called Verticals in Hair. he really gets deep into the science behind straightening. Hairs Talent, which is on youtube, is also a good place to get more information about Japanese straightening as the main stylist is also an expert. there are many videos showing that Japanese straightening can be done on afro textured hair. and here is an example:

notes: one, she's not applying the solution throughout the hair, she's applying a protection cream on the preciously treated hair. two, they are not using gloves because the solution is so mild. three,  in the video she doesn't say it, but the little girl's mother didn't have the same hair type and didn't know how to take care of it, but didn't want to relax it. personally, I still think you should wait until age 13 and until your child is mature enough before permanently straightening their hair, because even though hair health isn't an issue as with sodium hydroxide relaxers, the child might grow up with identity issues. but I also understand their situation. and lastly, in the video she's saying bad hair isn't a hair texture, everyone has bad hair, but when you learn how or know how to take care of your hair is when your hair is good hair. good hair is healthy hair that looks good on you. the video didn't get the ratings it deserved due to people misunderstanding what she was saying.
HOME JAPANESE STRAIGHTENING
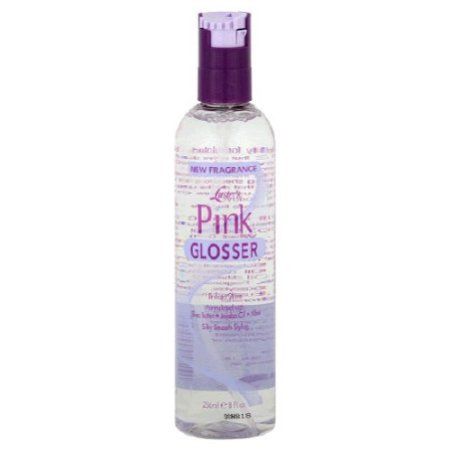
although I loved the results I got from Hairs Talent, it was just too expensive and far away. but I met someone who also Japanese straightens, LadyAradia from hairlista.com, but does it at home. I had no idea they sold Japanese straightening kits! the two I'm more familiar with is One n Only thermal ionic straightening and Quantum thermal straightener.
I Japanese straightened my roots about a week ago using One n Only thermal ionic resistant formula.  at sally's I noticed the thermal kit had an added label that says "keratin" on the box, and I have no idea why. people might confuse it for a Brazilian keratin treatment. it might be because the straightening lotion has four different proteins.

the ingredients for the straightening lotion:
water, ammonium thioglycolate, cetearyl alcohol, diammonium dithiodiglycolate, laureth-23, mineral oil, pentasodium penetrate, ammonium hydroxide, sodium lauryl sulfate, hydrolyzed keratin, hydrolyzed corn protein, hydrolyzed wheat protein, hydrolyzed soy protein, fragrance, benzyl salicylate, hexyl cinnamal, linalool.

what the kit comes with:
a clarifyig shampoo
porosity leave-in
straightening lotion
neutralizer

and here is the looong procedure that happened:
20 minutes )  applied roux ph porosity on newgrowth. I had absolutely no breakage doing this thanks to the henna gloss I did last week.
5 minutes ) went under dryer
10 minutes ) used clarifier & plan apple cider vinegar rinse
about 30 min ) airdried instead of blowdrying, applied porosity leave-in on semi damp hair
about 30 min ) detangled hair to the point where a fine tooth comb could pass and divided hair in 8-9 sections. I had been experiencing little breakage when combing during my stretch, especially since using henna the previous week. but since my hair was dry without any real conditioning (the leave-in is very light and liquidy) I did get some breakage at this point.
about 30 min ) applied protection cream on previously treated hair. the protection cream made my feel a little stiff so I was afraid I was getting protein overload since I just hennaed it last week and had no idea what the cream was made of, there was no ingredients on the jar. since it was a chemical protection it could have been filled with heavy proteins.
20 minutes ) starting from back to front, applied straightening lotion on newgrowth
10 minutes ) continued to smooth the newgrowth and apply more lotion to areas that looked like it needed more
20 minutes )  had plastic cap on. processing time always scared me! I was worried because the back of my head had the lotion on for 50 minutes, but my front 30, but than again the back of my head is curlier than the front. though the directions say up to 30 minutes, I read reviews with people going longer like 45 minutes. I also realized I wasn't sure how it should look when processed. when I saw the curl was loosened and wavy-ish was when I thought it was processed, but my mother thought it was suppose to be straight.


13 minutes ) I rinsed my head for 7 minutes, lifting my hair so it wouldn't rinse into my relaxed length. then I let my hair down and continued rinsing. I was relieved at this point because my relaxed length felt moisturized rinsing out the protection cream, and from this point forward I've experienced no breakage. at this point my hair still had some texture to it.


about 1 hr 30 min ) I applied the porosity leave-in and aphogee again, then blow dried the roots of my hair, which was very easy, to 80% dry. my roots were flat ironed in skinny pieces and a 90 degree angle using a corioliss ceramic flat iron (I used a ceramic instead of a tourmaline ceramic because ceramics flat iron straighter ). and THEN I lightly flat ironed the rest of my hair using my fhi go styler tourmaline ceramic iron (I'm still not perfectly sure why the whole head has to ironed, but better safe than sorry). my hair, especially my roots, looked pin straight at this point.
20 minutes ) I saturated my hair with the neutralizer, especially the roots (the whole head is suppose to be neutralized even with a touch up). at this point my hair didn't revert back to how it looked when I first rinsed out the straightening lotion, but it didn't stay pin straight either. it looked like it has it had a flattened wave, if that makes sense.
about 30 minutes ) I let the neutralizer sit for about 10-20 minutes and rinsed out my hair for 7 minutes. I than used the rest of my apple cider vinegar rinse since I had left over and didn't want to use a conditioner. using a conditioner is optional but using one can hinder the final results of your hair if your trying to go for a more straight look. but I felt the acv make a big difference in the smoothness of my hair. I only rinsed out half of it and left in as a leave-in.


45 minutes ) I applied the leave-in and aphogee once more, blow dried my roots with my fingers, and lightly flat-ironed them with my fhi go styler (on about 200 degrees). finally done!


(( click here to see my update! ))

growth aid exams ( how much growth will I get? )

$
0
0
MEASURING
summer is a time for testing growth aids!

lately when I use growth aids I've been using more than one and so am unable to know what is really contributing to my growth. for example, in my crazy growth overload challenge I got an inch a month, but did not know what was contributing to it. so since it's summer and I have more free time I will be taking advantage of it by testing and recording my growth aids separately, one at a time. I've already experimented with taking zinc supplements for 3 weeks. taking zinc was what I thought contributed to my rapid increase in growth in my recent growth challenge, but surprisingly I did not notice any increased growth rate. I might test it again in the future, but not this summer.

so here is my planned testing schedule (most of them are 3 week long periods):
  • june 20 - july 4 ) cayenne pepper
  • july 7 - 14 ) inversion method
  • july 15 - 29) bamboo tea
  • july 30 - august 13 ) sulfur mn mix
  • august 14 - sept 4 ) green house effect method & natural dry shampoo
  • september 5 - 15 ) cowash, oil rinse, & no manipulation
another reason I'm choosing summer is because hair usually grows a little more in summer weather. hair grows better in warmer seasons because cell division, the cause of hair growth, increases due to increased circulation.
_______________________________
listed here are my updated growth exam posts
update 1
_______________________________


CAYENNE PEPPER
cayenne pepper oil is known to work as a growth aid by increasing the scalp's circulation. there are two chemicals found in the pepper that are thought to contribute to this: capsaicin and quercetin. capsaicin stimulates the follicles, while quercetin brings blood flow to the scalp. girls who have tried it report tingling/burning sensations when they use it, while others report barely feeling anything. most times that I have used my cayenne pepper oil, I also barely feel anything. from what I've read, however, whether you feel stimulation or not the cayenne pepper is still working. this is most likely because the increase in circulation is actually due to the two chemicals present in the pepper and not just the tingling. this looks like a great option if you're too lazy to massage your scalp to increase blood flow like me!

there are some bad reports about very itchy scalps by some healthy hair journey girls, but these reports seem to be from girls who used it too often or were allergic. some people let it sit on their scalp for a week, crazy people that like to live life on the edge! sorry bungee jumpers out there, but I'm pretty sure-footed. to be safe I use it before washing, usually while I prepoo/hot oil. I haven't had any bad reactions.

I've already used it a week ago and had it on my scalp for about 30-60 minutes before washing. I'll be applying again after posting this and will be letting it sit overnight since I haven't noticed much burning, or even tingling all the times I've used this. the oil mix I've used until now was very simple, just cayenne pepper powder and olive oil. but tonight I'm going to add a little more to give it a boost.

MY RECIPE
1 CUP olive oil
2 TBSP cayenne pepper
5 DROPS peppermint oil (optional)
1 TBSP jamacian black castor oil (optional)

note that after mixing your vegetable oil and pepper powder you have to let it sit for a week for it to fully infuse. though I use olive oil, any vegetable oil can be used. I good idea would probably be to use castor oil as the base as it's a growth aid by itself. the cayenne pepper will act as a catalyst, helping the castor oil penetrate the scalp better. if I notice an increase in growth, in the future I'll probably try cayenne pepper powder mixed with jamacian black castor oil. but for now, it's just a tablespoon. 

pre-pool (how to prep hair before swimming)

$
0
0

PROTECTING YOUR HAIR
chlorine and salt water can be very damaging to the hair, they cause dryness and increase porosity. but this doesn't mean you have to skip out of the fun of water during the summer! there's a proper way to prep your hair to help shield it and minimize the damaging effects of chlorine and salt water.


this is just like a pre-poo treatment, except you saturate your hair in fresh water before you apply your oil or conditioner. simple, right? think of the hair cuticle like a cup with a sponge in it. if you go straight into chlorine or salt water the sponge will absorb that damaging water, but if you pour fresh water first the sponge will absorb that and there'll be no room for the damaging water. putting a layer of oil over the sponge will make it even harder for salt/chlorine water to penetrate. that's why I prefer to use oil, rather than conditioner, to prep. it also helps to make sure your hair's porosity is low as it'll make it harder for water to penetrate your strands. remember,

WHAT DO I USE?
I was on vacation to Cayman Island a few weeks ago. I decided to use my miniature luster's pink glosser spray as my pre-pool oil. and I rather liked it, it seemed to get the job done. in the future, when this runs out, I'm going to try to use shea butter oil or other products with shea butter. I choose luster's pink glosser because...
  1. I had it left over from when I first started my hair care journey and wanted to get rid of it 
  2. it was small and convenient sized
  3. though it says it's non greasy, but from my memory it was greasy but light
  4. it had shea butter in it. in my past experience, using shea butter in a deep conditioner left a very heavy barrier on my hair, like 5 times the power of a sealing oil. it was so bad that it felt like the shea butter prevented moisture from entering my hair, and I hadn't even used much of it in the deep conditioner!
  5. the ingredients look pretty good: C9-11 Isoparaffin, C14-16 Normal Paraffin, Isoeicosane, PPG-14 Butyl Ether, PPG-40 Butyl Ether, Shea Butter Extract, Vitamin E, Jojoba Oil, Wheat Germ Oil, Kola Nut Extract, Eucalyptus Extract, Aloe Extract, Papaya Extract, Chamomile, Henna Extract, Lemongrass Extract, Hydrocotyl Extract, Safflower Oil, Castor Oil, Mink Oil, PPG-3 Benzyl Ether Myristate, Ethylhexyl Dimethyl PABA, Fragrance, Benzyl Benzoate, Hexyl Cinnamal, Benzyl Salicylate, Citronellol, Amyl Cinnamal, Butylphenyl Methylpropional, Eugenol, Hydroxyisohexyl 3-Cyclohexene Carboxaldehyde, Hydroxycitronellal.
so after applying my pre-pool products, I usually tie my hair in a single indian braid or a high bun, it depends on how active I'm going to be in the water. here is a picture of me in Cayman Island, before  heading to the jacuzzi.


hair journal page (1)

$
0
0
I've been experiencing a little additional breakage this week, and so I decided to keep a journal here to keep track of what I do. this is what I usually do when I start experiencing additional breakage. it's really not that much though, but considering that I've only been getting several strand in my comb for the past months, I guess it is depending on how you look at it. I've been getting about a marble size of breakage, the cause is either too much protein use or new growth coming in from possibly doing the Japanese straightening improperly. but instead of writing in a my physical hair journey journal, I'm be writing it here to share with you!
 
 
july 16
wash day - I applied cayenne pepper oil on my scalp and luv natural leave-in on my hair as a prepoo. then I detangled & bunned. I ended up doing the cayenne pepper oil for 4 weeks instead of 3 like in my growth aid exams post.  I left it in for 60 minute & henna glossed 3-4 inches away from my head, avoiding the freshly japanesed straightened roots. this time I didn't oil my hair before hand and used more Aveda malva. I went under the dryer for 15 minutes and let it sit for an additional hour. this was my second time using Aveda, and I noticed more coloring than last time. I washed my hair with shampoo and deep conditioned for 15 minutes under the dryer again. I rinsed my hair thoroughly, sprayed my leave-in, and airdried. as it airdried it still felt stretchy, so I applied aphogee green tea, made 6 buns, and went under the dryer a little. after that I applied my vatika frosting and put my hair in 1 bun. didn't comb or touch my hair until 3 days later.

july 18
note to self - don't go to sleep with a hair chopstick! I accidently did last night... and it broke in my sleep. I lost my other one so now I only have one left.  
july 19
daily - I combed my hair and found out the henna made the breakage worst! it went from the size of a marble to double-triple. did a hair assessment and figured out I was lacking elasticity in some parts. I should have done that before doing the henna, my fault. the parts with too much protein seemed to be mostly be from my Japanese straightened hair from Hair's Talent, which makes sense since it has more strength than my relaxed hair. I also remember in Cayman I mixed protein conditioner in my luv natural leave-in since I was going in sea water everyday. so I remixed my leave-in, applied my cholesterol oil, and baggied my head for about 6 hours. I combed my hair and the breakage reduced, yay! I'm going to keep my hair tied and do a moisture and cholesterol treatment next week.

growth - the reason I combed my hair in the first place was to start the inversion method (yes I know I'm off schedule!). I wasn't sure whether to use an oil with this method or not, so I made a mixture of olive oil, jojoba oil, and aloe vera to try to refrain from making build up on my scalp.

july 23
wash day - I decided to do a conditioner-like wash. I mixed together my aubrey organics white camellia conditioner, aloe vera, queen helene cholesterol oil, and molasses together, and applied it to dry hair. it sat for a couple hours until I rinsed it out, used the plan white camellia in the shower, and half rinsed it out to serve as a leave-in. after t-shirt drying I applied my fantasia ic serum, mostly to my roots, tied my hair in 4 buns, and went under the dryer. going under the dryer with wet hair helped smooth my new growth better. before I would wait until it was 50-70% dry. I combed and tied my hair in braided pigtails with a scarf, this style turned out cute and will protects your ends better than normal braided pigtails. I'll do a tutorial on this soon, after seeing how long the style lasts. I didn't really notice a difference in breakage, so next week I'm planning to prepoo with cholesterol oil, maybe put aphogee 2 min on my roots, use a clarifying shampoo, and deep condition.

july 24
growth - this is going to be my sixth day of doing the inversion method. I've only used my light mixture three times because I want to refrain from combing my hair and having to redo my protective style everyday... plus I'm lazy. the way I've been doing the inversion method is by letting my head dangle off my bed and couch. I might end up doing this a little longer than a week, it's been ten days and I still haven't received my bamboo tea yet.

july 25
info update - blogger Age in ATL does a monthly post titled hair inspiration spotlight. she asked me to do an interview which I quickly accepted. it was posted today on her blog, Loving My Hair. Check it out, her blog is pretty popular! I also found out that the reason my bamboo tea hasn't come in the mail was due to a mix up in payment, so I'll be testing the GHE method starting tomorrow instead of waiting for the tea.

july 26
info update - running out of moisture conditioners, I bought V05 calming chamomile tea therapy. my hairveda products are really starting to run out, but I want to save money right now. I'll probably be doing a cheapie's haul soon.

july 30
wash day - today was literally a wash day. I did a number of things that expanded to the whole day, like how I use to when I first started taking care of my hair. I began with a prepoo treatment using queen helene's cholesterol hot oil throughout my hair and aphogee 2 min only on my roots. while I applied these I braided my hair into 6 loose braids to prevent tangles while shampooing. that sat on my head for 30 minutes with a cap. I than clarified with a diluted trader joe's balancing spa shampoo for the first time. I had made a mixture of black, green, and peppermint tea, and sprayed it on my scalp and ends before applying my deep conditioner. I added salt and queen helene cholesterol cream to my moisture deep conditioning mix. I steamed for 15 minutes, thoroughly rinsed it out while finger detangling, and let my airdry (to take pictures of my texture). lastly, I did the l.o.c method, or more specifically the l.o.c.o method.my breakage reduced again as I combed my hair and braided it into a scarf!
l - damped hair and used my luv natural leave-in
o - trader joe's jojoba oil
c - hairveda whipped  cream ends
o - hairveda cocasta shikakai


growth - it seems that I got a half/quarter of an inch doing the inversion method. now I've been doing the ghe for two nights. I'll be making an update to my growth aid exam post soon.


japanese straightening ( my 2nd touch up results )

$
0
0
MY PROCESSED ROOTS
 
so I realize I never made a clear update on my Japanese straightening results. to see my first post explaining what Japanese straightening is, click here. so here are pictures of my roots more than a month after the processing. I have a little new growth. these pictures are after clarifying and letting my hair dry without any product (remember! you should always let your hair dry with product. I did this so you guys could see). as you can see, they didn't come out dead straight like my results from hair's talent. the top layer of hair looks straight, not dead straight, but straight. but under there are some texturized pieces. when I put my hair in a bun as it air dries it straightens. I realize several mistakes and things that I probably did wrong, and won't do if I home Japanese straighten next time.
  1. it's important to correct porosity after the process, not before. after clarifying my hair I shouldn't have did a plan apple cider rinse. not because it would have created a barrier, as it had no oils and I rinsed it out thoroughly, but because higher porosity hair processes better.
  2. at Hair's Talent, they would lightly blow dry the new growth before applying the solution. I'm not sure whether I should have done this. it would have enabled me to apply the solution faster, but it might have also stressed my hair.
  3. before applying the straightening solution, though I didn't record it, I recall lightly applying aphogee green tea throughout my hair. this was a careless move as it probably made a barrier on my new growth.
  4. I didn't do a patch test due to the time I thought I had to do the process being shortened.
  5. the girl that was suppose to help me do my hair and sometimes did my relaxers in the past couldn't make it. I have done relaxers on others before, but not on my own head. to try to compensate I had two girls help me. they were use to dealing with afro textured hair before, but never applied a straightening solution.
  6. while applying the solution, I'm not sure if my hair was being stretched and smoothed enough. I also realized half way through that not enough solution was being applied. I feel this, and using aphogee green tea, were the main contributors to my texturized strands.  my hair is very thick and coarse and only 60-70% of the jar was used when all of it should have been used.
  7. before, in my first post about Japanese straightening, I had stated that I realized I was not sure how my processed hair was suppose to look. apparently my hair was suppose to already look straight, and not have a texturized look.
 
TECHNIQUE & TEXTURE
Japanese straightening, like sodium hydroxide relaxing, takes skilled hands. proper results depend more on technique. but I learned from this, I knew from the start I might get a little wave trying it at home for the first time. on sallybeauty.com's review on the product, many girls of other descent and with looser curls noted that their hair didn't become perfectly straight like at the salons. while I girl I know with a texture similar to mine was able to get the dead straight results. so again, technique really counts. Even the kinkiest hair texture can get the dead straight look if they go to an expert.

I also want to go a little more into how to decide how strong your Japanese straightener should be. curliness, density, and cuticle size needs to be put into consideration. before I realize I only mentioned curliness. as said before my hair is very thick and coarse, but my hair texture somewhere in the 3b-4a range, not sure. this is why I used one n only, one of the milder brands, but got its resistant formula. here is a list of recommendable Japanese straightening kits, which I tried to list from weakest brand to strongest, but this could only be based on reviews I've read as I haven't actually tried all of them: one n only, matrix opti-smooth, bio ionic retex, loreal x-tenso, and yuko or liscio (the originals that most salons use). note that a stronger brand doesn't mean more damaging to your hair.

WHAT WILL I DO NEXT?
I've really been debating whether I should keep my roots the way it is, or should try to fix it. like sodium hydroxide relaxers, you can do a corrective. one of the many reasons I had decided to Japanese straighten was to have the dead straight look to make detangling easy, as the longer my hair grows the more there is to detangle. I also would not have minded the little texture if it synchronized with my whole head. but after much thought I've decided it's not too curly to bother me. I rather have it healthy and wavy than over processed and straight.

I did decide that, unless I change my mind for some reason, am going to go to a salon next time. I decided to do this because it might take a few more times to learn to do Japanese straightening and get dead straight results. I'm not sure if I want to go through the trial and error. I would use a stronger Japanese straightening brand, but I'm afraid of negative effects on my sodium hydroxide relaxed length. I also decided to go to a salon because I found a super cheap one that is much closer to me! there price is $170, they Japanese straighten on afro textured hair, and previously relaxed hair! I will be emailing them before going there to test them. the salon is called Organics Hair IB. they also have a helpful page that compares all the different straightening treatments they do.

while blog lurking I found an post from Nadege, owner of Hair Lush Chronicles, regarding her first encounter with Japanese straightened hair. here is a girl whose hair is an example of how fully Japanese straightened hair looks like! the next time I talk about Japanese straightening will probably be before going to Hair IB, so if there are any questions regarding this subject that I did not mention, please ask!

scarf braid tutorial ( for protective styling )

$
0
0
( it's sure been a while since my last post! I just got back from a family reunion and had trouble getting internet where I was staying. now I have to transition as summer vacation will be ending soon, I'll still try to be more consistent to make up for it. sorry for anyone waiting, here is the scarf braid tutorial I promised! )
 
SCARF BRAID

MY MOTIATION?
braided pigtails have always been my second go to style. I consider it more of a low manipulation style rather than a protective because the ends are not tucked away. for those of you that don't know, a low manipulation style is one where your hair requires little handing and keeps the hair from tangling, like braids. and again, a protective style is one where your ends are tucked away. I really like braids as a low manipulation style, my only problem is that, especially when my ends aren't thick, seeing my ends loose always bothers me for some reason. sometimes I braid down my ends and loop them before using a hair tie. would this be considered more of a protective style? maybe, kinda. but than I worry that the tension and friction from hair tie directly on my ends isn't good . am I worrying too much? maybe, probably.

so this is how I came up with this idea of using a silk scarf so I could tuck away my ends. this, I would definitely consider a protective style. I've been using this as a protective style very often this month. usually I have to redo it in the morning or every other day, but because it's also a low manipulation style I don't have to comb. I also sometimes do my hair in a single side braid using a scarf, but her is how I do pigtails.

TUTORIAL
  • Step 1: make sure you have a good sized scarf, the scarf I use is 60 inches long and 12 feet wide.
  • Step 2: I fold the width of the scarf once or twice and place it on my head. I make sure the ends of the scarf are even and clip one side so the scarf stays put while I braid the other side. the clip in this picture is a little hard to see, it's pink.
  • Step 3: I take three strands of hair, one of the sections will be braided with the scarf. I've tried only using two strands of hair and the scarf to braid, but didn't like the outcome. the result was too much scarf and not enough hair showing.
  • Step 4: I braid my hair like normal. when reaching the part where I would normally end the braid with a hair tie I stop and envelop my ends with the scarf.
  • Step 5: I twist half of the leftover scarf like shown so it's easier to ties into a knot.
  • Step 6: I tie it off with a knot. you can also envelop your ends and use a hair tie, but I like the look of the knot better.
  • Step 7: now you just un-clip the other side and redo the process... and you're done! 

growth aid exams update ( I octupled my growth! )

$
0
0
EXAM UPDATE
it' the end of summer (nooooo! I start classes tomorrow!) and I have growth updates to share! if you didn't read my first growth aid exams post talking about how I'll be testing growth aids, click here. here's a little recap, too:  for the past years I've been getting random hair growth spurts and didn't know what to contribute it to. after doing a crazy growth overload challenge and getting 3 inches in 3 months without knowing what to credit, I had decided to test my growth aids and practices and make proper recordings. hence beginnng my growth aid exams sequence!

 I've finally discovered what was increasing my hair growth during the crazy growth overload challenge : the green house effect method. I'm so happy I finally unlocked the secret to my random growth spurts! and it's something as easy as the GHE method.

I have not been paying attention to my planned testing schedule made in the previous post at all, and have completely been doing my own thing. this is also just an update and not the end of growth aid exams, I'm extending it beyond summer.  my goal right now is to thicken my ends rather than grow it out right now, so I've been trimming my straggly ends after each recording.


I TRIPLED MY GROWTH ...AND THEN I OCTUPLED IT!
here is a list of dates recording when I started what growth aid, the results, and my length after a trim.

june 2 - after Japanese straightening I trimmed hair to 25 inches
june 20 - started cayenne pepper oil
july 18 - sadly I saw no extra growth at all with cayenne pepper oil, it seems to work for other girls though
july 19 - started inversion method with about 25 1/2 inches
july 25 - finished inversion method with a thin 26 inches (gained 1-2 cm of growth)
july 26 - started ghe method
august 7 - measured about an extra 1-2 cm of growth, 26 inches 1 cm.
august 26 - measured 27 1/2 to 28 inches, but it grew out very thin so I just clipped off the straggly ends to 27 inches. started ghe & inversion method.
september 3, today - almost measured 29 inches, but the ends grew out straggly again. I trimmed more thoroughly this time and accidentally trimmed to 25 inches 1 cm, but I don't really mind it. especially now that I know the key to growing my hair faster! I'll be starting bamboo tea in conjunction with the ghe method today.

here are some pictures, sorry that I didn't take a picture for everything.

august 7 after doing the GHE method for about a week (not the best picture).
I had already got 1-2 cm of growth!

august 26 after 4 weeks of the GHE method.
I got 1 1/2 to 2 inches of growth!


august 26 after trimming to 27 inches.

september 3 after a week of the GHE method and inversion method.
that's almost 2 inches in just a week!
my normal growth rate is .6 cm a week, so that's octuple my normal rate
 octuple is too a word!

September 3 after trimming.
it's hard to tell in these pictures, but my ends are lowly thickening!

I'm pretty sure I've said it before, going to say it again, my ends have been growing out thin after being handicapped by a protein overload about a year ago now. it is also possible that these growth practices are only affecting parts of my scalp, but I'm 70 percent sure it's the former reason.

______________________________________________
so what exactly is the ghe and inversion method? learn more here and here
the green house effect method
the inversion method
______________________________________________


the green house effect (GHE) method

$
0
0
WHAT'S GHE?
in my last post about how I tripled and then octupled my hair growth rate, I said that the GHE method was the main factor in my growth (click the link to see the before & after pictures). shortly followed by the inversion method. for those of you who don't know, the GHE method is simply keeping your hair in a plastic cap over night. It's advised to do this no more than every other night and at least once a week. you can follow the plastic cap with a scarf to secure it or another cap to increase the effect. or, if your relaxed and want to keep your style straight you can put on a scarf before the plastic cap.


the GHE method originated from the Real Queens Regimen. the method creates a steam like effect on your hair and scalp. when we put a plastic cap on for an hour to deep condition, our body's temperature naturally heats the environment trapped in the plastic. GHEing uses the same idea, the reason for its name. so isn't that just baggying your whole head? yes and no. the difference with the GHE method is that the main focus is on the scalp. though you can, you don't have to apply anything on your hair or scalp before doing the GHE method. the aim is to put your head in a steamy environment for 6-8 hours. oil or leave-in is optional, though I would advice only using a little. you can get a moisture overload if your not careful. plus your scalp and hair is going to be moist after using the method, whether you used product with it or not. the steam effect increases blood circulation and aids sebum flow, increasing your growth rate and length retention. 

for the past two years, I had been getting random growth spurts but didn't know who to credit it for as I had been doing multiple things at the same time. finally I can give rightful credit to the GHE method!
   

HAIR SCIENCE

I remember on a popular hair care forum, there was a girl that started a GHE method challenge, claiming you can double or triple your normal growth rate. I participated in the challenge for a short while, but stopped for a reason I can't remember. I remember in the challenge thread, she was given a hard time from older, 'more knowledgeable,' forum users who where trying to tell us that the GHE method is not going to triple, or even double, our growth rate and the minor increased growth people see is retained length. 

I understand that they were trying to enlighten us and didn't want us to try something supposedly guide-less to end up disappointed. this, however, isn't a good mindset to keep when on a hair care journey. whether your a novice or have been a healthy hair journey girl for years, we have to remember that we're not professional scientists when regarding hair. well, there might be a couple out there that are anatomy or physiology scientists, but I'm generalizing. we can test things, analyze, and record, but we can't know exactly why we see the outcomes we see unless its been scientifically proven. we can make educated, logical guesses, but in the end they are guesses, not fact. I think that we do experiments so much that we forget we're not real scientists. the older forum users argued that growth rate can only increase through increased blood circulation and keeping your scalp clean. these, as far as we currently know, is true. from what I remember, I agreed, but brought to the table that the GHE method claims to increase growth due to the heat it creates. no one was able to explain why I was incorrect. 

the point is, it's better to test something and then come up with an explanation, not the other way around. this is stuff we learned in elementary school: the scientific method. when we make a prediction and explanation it's called a hypothesis because it's only supported by the information we think is true, not reality. after we perform the experiment we have a better touch with reality and can come up with a better explanation, the conclusion. our previous hypothesis might have been right or wrong, and if wrong we have to adjust our thinking. this is why healthy hair girls, especially those who have been on their path for a long time and develop egos (it's hard not to develop one! but there's a difference between ego and confidence), should always remember to stay open minded. none of us, whether we have been on our journey for 1 year or 30 years, know everything regarding hair. if we make a hypothesis (or pre-conclusion?) that something won't work and therefore we won't test it and tell other people not to test it, we can cause ourselves and others to miss out on tripling their growth. a journey is all about trial and error. unless we have fear that something can negatively effect us, experiment. 

that's kinda the whole point in me doing these growth aid exams


MY EXPERIMENT'S CONCLUSION
so why does the GHE method work? I have a couple reasons why. but remember I, and generally no one in our healthy hair journey community, is a professional scientist. what we tell you are educated guesses from our own research and logic. the educated explanations I list might all be true, only one or two might hit the mark, or the reason might be something completely different. but I'm sure it's at least one of these reasons. 

increased sebum flow helps length retention. this might be a factor, but is differently not the prime suspect. to say that the GHE method only helps retain length is to say that I, and all the other girls that doubled or tripled their growth rate doing it, has an average growth rate of 1 or 2 inches a month.  this is very very unlikely. the average growth rate is 1/2 an inch a month and my normal growth rate is 1/2 an inch every 5 weeks. and what makes this even more unlikely is that it suggests that when I don't do the GHE method I'm only retaining 1/4 of my normal growth rate. with the zero to minimum breakage I usually get, that's impossible. 
heated environment increases blood circulation. this is a more likely reason for the increased growth rate. our scalp is the most difficult place for our natural blood circulation because the blood has to move upwards, to the top floor.  remember our follicles, not our hair, are alive. a good blood circulation means our follicles are receiving their proper nutrients, proper nutrients equal healthy follicles, and healthy follicles equals a good hair harvest.
sebum has a naturally low ph, resulting in a healthier scalp conditions. our sebum has a natural ph of 4.5-5.5, pretty much the same ph as our hair. (remember oils don't have ph. sebum is oily, but it contains water.) keeping your scalp at a low ph keeps it healthy and protects our scalp from bacteria and fungus. I'm not sure, however, if it destroys the same type of fungus that grows in our sebum and minimizes our growth rate (this is how applying sulfur/oil mixes increase growth rate, it destroys these type of bacteria).
steaming removes toxins. though currently it's debated whether this is true. but if true, just like when we sweat the rest of our body supposedly detoxifies, the same would go for our scalp. a healthy clean scalp and healthy conditioned hair equals growth. sweating cleanses, but then the sweat/sebum stays there on top the scalp unless we wash it off.  during my growth exams I might try cleaning my scalp after and see if there's a change in results. though if I see an increase in growth rate, it might be because I'm unclogging my pores.


Viewing all 58 articles
Browse latest View live